
The following tutorial comes from the tutorial I wrote for sewing journal covers. If you'd like to read the entire tutorial, please see that post HERE.
Image Transfers
Now that I have a pretty good idea the total size of the jacket, I can "close" it and figure out how much space I will have to embellish the front cover. For this particular jacket, I decided to use three of my favorite vintage photos. I gathered my image transfer stuff and got busy.

I'm still a beginner at this image transfer process so I've been experimenting with different methods. I've found the most success using transparencies. For this project, I printed the three images onto one full sheet of clear mailing labels. Sidenote: transparencies are expensive. I've tried to get as many images onto one sheet as possible in order to not waste an entire sheet for one photo.
Okay, back to the tutorial. Using a sponge brush, place a thin layer of gel medium to the spot where you want your image to transfer to. Now cut out your image, place it face down on top of the gel medium you just applied and burnish it using a brayer or spoon. Remove the transparency and your image should now be on your fabric.


Allow the transfers to dry completely. Next, I decided to jazz up the images by hand coloring or enhancing them with fabric markers and pastels. Adding color to the black and white images reminds me of vintage photos that have been hand colored. I really love the look!

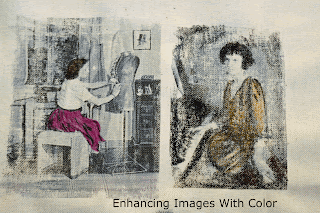
If you don't want to color the images, don't! There really aren't any rules here! If you do add color, be sure to set the colors with your iron. A good idea is to place a piece of tissue paper on top of the image while ironing and don't slide the iron around as this can smudge the ink. Once the images are dry, distress with distressing ink if desired. I desired, so I did.